|
No hay comentarios de productos.
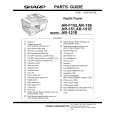
Right plate assembly
1 2 3 4 5 Remove the left side, back, right side, and top covers (see pages 80 through 87). Remove the front cover, toner cartridge door, and front guide assembly (see pages 89 through 95). Remove the solenoid (see page 108). Remove the fan assembly (see page 110). Press the small white tab to release the clutch (callout 1), and slide the clutch to the left (toward the pickup roller).
Note
Make sure that the two halves of the clutch stay together. If they separate, you might lose the clutch spring.
Figure 56.
Removing the right plate assembly (1 of 2)
112 Chapter 5 - Removal and replacement
EN
|